
The Ultimate Guide to Apparel Decorating
Master every technique from screen printing to direct-to-film using tutorials provided by industry experts
Sometimes the best way to learn a new apparel decorating method is to roll up your sleeves and get your hands dirty. Hands-on education is a valuable way for new and even seasoned decorators to hone their skills. And when shop owners and their employees can't physically attend a workshop or other in-person training session, tutorials that outline how to execute a process to perfection serve as a strong method to learn.
The following all-encompassing feature from Apparelist provides several different tutorials on all of the major decorating technologies currently being used in the industry:
For any decorator, this is the ultimate guide to apparel decorating that can be referenced again and again. Not only will you get detailed decorating direction, but each tutorial is accompanied by additional information such as alternative methods, market analysis, product outlines, and more. Provided by some of the industry's most seasoned veterans, this comprehensive guide is perfect for every apparel decorating business.
Table of Contents
- Producing DTF Transfers: Two Pathways to Success
- How to Print Custom Stadium Seats and Rally Towels
- Creative Sublimation HTV Ideas for Decorating Apparel and Accessories
- How to Optimize Plastisol Ink for Better Prints
- How to Achieve Top-Notch 3D Puffy Foam Embroidery
- How to Create an SOP for Image Placement for DTG Printing
Tutorial No. 1 – Producing DTF Transfers: Two Pathways to Success
By Terry Combs, Equipment Zone
Direct-to-film (DTF) transfers can be produced using two similar digital technologies. The first uses a direct-to-garment (DTG) printer to output DTF single sheet films. The second option uses a roll-fed DTF film printer with included powder/shaker/dryer. Let’s take a walk through both methods.
What separates one digital decorator from the next no matter what technology you use is commonly the artwork. Ideally, you should start with an image saved at full size, 360 DPI, with a transparent background.
DTF Printing with a DTG Printer
Step One: For this example, I use the Epson F2270 DTG/DTF printer. Note that you’ll use the same ink and software, so nothing has to change on your printer other than loading film instead of a shirt. In Epson’s Garment Creator 2 software, import the file and select the Film tab to automatically flip the artwork to reverse reading. The software also tells the printer to print in reverse order, color first then white, and lay down less ink than a direct print on fabric.
Step Two: Place the sheet of film on the shirt platen. If the platen has a gripper pad (a course fabric cover), no taping is necessary. If you have a smooth platen, a piece of blue painter’s tape on opposite corners keeps the film from moving during printing.
Another option is a vacuum platen like the one in our example from Livingston Systems. Set the film size switch and lay the film on the platen. Engage the vacuum and print. After printing, disengage the vacuum and remove the film. The vacuum is powered by a rechargeable battery or plugged into a 110 outlet.
Step Three: In DTF printing, as mentioned, the color prints first, followed by the white ink. If there’s a heavy laydown of ink, you may want to set the printed film aside for a couple of minutes to allow for some air drying before applying adhesive powder.
For this demonstration, I apply adhesive powder on the Equipment Zone EZ Shake, an automatic powder/shaker for cut sheets. The film is set on two clips that can be adjusted for different sizes of film sheets. First the powder drops onto the film and sticks to the wet ink. Second, the film holder vibrates to shake any excess adhesive from the film sheet.

An alternative is a shallow tube larger than the film sheet and a flour scoop. Lay the film in the tube, scoop adhesive powder onto one end of the film, lift the film from that end, and let the adhesive slide over the image area. The adhesive will stick to the wet ink. Then tap the back of the film to release any excess adhesive powder.
Step Four: In this example, I cure the film (melt the adhesive powder) in the EZ Cure oven. On average, this process takes about 60 seconds. An alternative is to purchase a bottom heat element for your heat press. Lay the film on the heated platen at 330 F for 60-90 seconds to cure. As a final alternative, you can use the heat press you have. Clamp the press closed at 330 degrees for about 30 seconds. Open and lay the film on the heated platen. The printed film should cure on the hot platen in about 90 seconds. With either heat press method, you can hover the heating element to hold in the heat.
If you get your film curing advice from the internet, it’s possible you are curing the ink and adhesive simply by hovering over the film with your heat press. Since heat presses are contact heat sources, this process could take six, eight, or even 10 minutes. Hovering only is not a viable curing method.
If you’re a screen printer, you can use your conveyor dryer to cure the films. You’ll need to experiment a bit to get the right dryer speed at 330 F. You will need to speed up the belt in this process.
Step Five: How do I know when the cure is complete? The adhesive on the back of the film looks uneven, like an orange peel. The adhesive won’t be orange but will feel like the surface of an orange.
We’ll discuss applying the finished transfer after the DTF section that follows.
DTF Transfers on a Free-Standing DTF Printer System
Step One: For this example, I print on the Equipment Zone EZ JET PRO 24 MAX. This is a 24”-wide film stand-alone DTF printer and powder/shaker/dryer that produces 300 sq. ft. per hour.
Just like with the DTG printer, import the file or files into the Cadlink/Fiery RIP software. One advantage here is that you can load multiple files, tell the software how many and what size of each file, and the RIP will nest (like a puzzle) the files to make the maximum use of your film.
Step Two: The film is fed into the printer, and the production process commences. Once enough printed film advances, your operator will feed the film into the powder shaker. Being careful not to let the printed films touch during the loading process, continue to load the film down into the adhesive powder and back up the other side until you can load the film onto the dryer. In the dryer, the adhesive will melt, and when it exits the dryer, the transfers are ready to be cut and applied to your garments or other porous substrates.

Handling and Applying DTF Transfers
If you are storing or shipping the film sheets or rolls, seal them in Ziploc bags or cardboard tubes with silica gel packets. That keeps the films from absorbing water and causing color distortion or even release of the image from the film.
One of the greatest advantages of DTF transfers is that you can apply them to most any fabric. Experiment but as a starting point, heat press 100% cotton at 325 F, 50/50 blends at 300 F, and 100% polyester at 275 F.
Using medium pressure, press for 15 seconds. Peel your film and press a second time for five seconds. For this second press, lay a t-shirt, or fabric or buckram sheet over the image before the five-second press. This second press with fabric over the image softens the print and takes away some of the plastic feel of the finished print on your garment.
DTF films are here to stay. Embrace this technology as another tool in your garment decorating toolbelt.
Terry Combs is the cohost of the industry podcast, 2 Regular Guys. He has written hundreds of management and technical articles, and is a regular speaker at industry trade show events. He is currently in sales and training with Equipment Zone, Tempe, Ariz.

Tutorial No. 2 – How to Print Custom Stadium Seats and Rally Towels
By Sue Wilcosky, STAHLS'
In sports, the little details make all the difference — whether it’s the energy of the fans, the bold team colors, or the giveaways that everyone wants to take home. Did you know you can use a heat press to customize items like stadium seats and rally towels? These items may seem unconventional, but they’re perfect for showing off team spirit and making game day unforgettable.
For decorators, customizing these sports-related items is a practical way to expand services. For teams and event organizers, it’s an opportunity to offer unique fan gear that stands out. With the right heat transfers and some simple techniques, you can create professional-looking designs that are durable and eye-catching.
This article guides you through the process of using heat transfers to print on stadium seats and rally towels, step by step. Whether adding logos, slogans, or team mascots, you’ll learn how to make these items both functional and fun. Let’s dive into the how-to and help you take your heat press skills to the next level!
Choose Your Transfer
When it comes to customizing rally towels and stadium seats, choosing the right type of transfer is key to achieving vibrant, durable designs that withstand wear and tear. Each type of transfer has unique qualities suited to different needs. Here's a closer look at how they work for these items:
Heat Transfer Vinyl (HTV)
HTV is a go-to option for creating bold, one-color designs or simple graphics on rally towels and stadium seats. It’s ideal for small runs or personalization, as you can cut and weed designs to match team logos, numbers, or slogans. HTV works best on smooth, flat surfaces, making tightly woven rally towels and vinyl or coated stadium seats a great match. The application is straightforward, requiring just a heat press and proper alignment.
Direct-to-Film (DTF) Transfers
DTF transfers are perfect for intricate, full-color designs that include gradients, fine details, or photographs. With their soft, flexible finish, DTF transfers adhere well to both towels and stadium seat covers, offering high durability.

They’re particularly effective on polyester fabrics or coated surfaces, and their ability to stretch without cracking makes them versatile. Plus, DTF transfers work well for medium to large production runs, providing efficiency without sacrificing quality.
Screen-Printed Transfers
Screen-printed transfers are an excellent choice for high-volume projects or when you need a vintage, soft-touch finish for one- or two-color logos, which is typical in the team sports world. Screen-printed transfers deliver sharp, vibrant results on cotton towels and offer durability even after multiple washes. For stadium seats, screen-printed transfers can be customized for smooth vinyl surfaces, providing excellent adhesion and long-lasting performance. They’re also more economical for bulk orders, making them ideal for giveaways or large promotional events.
The best transfer type depends on your project’s requirements. For rally towels with smooth weaves, HTV and screen-printed transfers deliver standout results, while DTF transfers are a better choice if you have full-color, more complex artwork. Stadium seats, often made of synthetic materials like vinyl, pair well with DTF or screen-printed transfers for vibrant, durable designs that hold up in outdoor settings.
Understanding these transfer options allows you to tailor your approach and create fan gear that not only looks great but also lasts.
Printing a Rally Towel with a Screen-Printed Transfer
Rally towels are often handed out as giveaways or sold as merchandise, making them a cost-effective way to showcase team logos, slogans, or sponsor branding. Most rally towels are made from cotton or cotton-polyester blends, offering a soft yet durable surface ideal for customization. When it comes to heat printing, towels with a smoother weave or tighter knit work best, as they provide a flat surface for the transfer to adhere evenly. Avoid towels with heavy textures or deep loops, as these can interfere with the clarity of your design. By choosing the right type of towel, you’ll get bold, vibrant prints that fans will proudly wave in the stands.
Items Needed
- Rally Towel
- Goof Proof Screen-Printed Transfer
- Heat Press
How to Apply a Goof Proof Screen-Printed Transfer
There's a fascinating twist in the history of rally towels that touches on fan psychology and team strategy. While rally towels are typically a unifying gesture to support the home team, there have been instances where the opposing team handed out rally towels in their own colors. The goal? To minimize the appearance of overwhelming support for the home team.
One such instance occurred during high-stakes playoff games, where the psychological impact of a "sea of fans" in the opposing team's colors was leveraged as a subtle strategy to disrupt home team morale. According to Yahoo Sports, in 2016, the Washington Commanders (then known as the Washington Redskins) faced the Pittsburgh Steelers at FedEx Field. Anticipating a significant presence of Steelers fans waving their iconic yellow "Terrible Towels," the Commanders distributed burgundy rally towels to their supporters. Despite these efforts, the Steelers won the game 38-16, and the stadium still showcased a notable display of yellow towels. This incident highlights how teams use rally towels not only to boost their own fans' morale but also to mitigate the influence of visiting supporters.
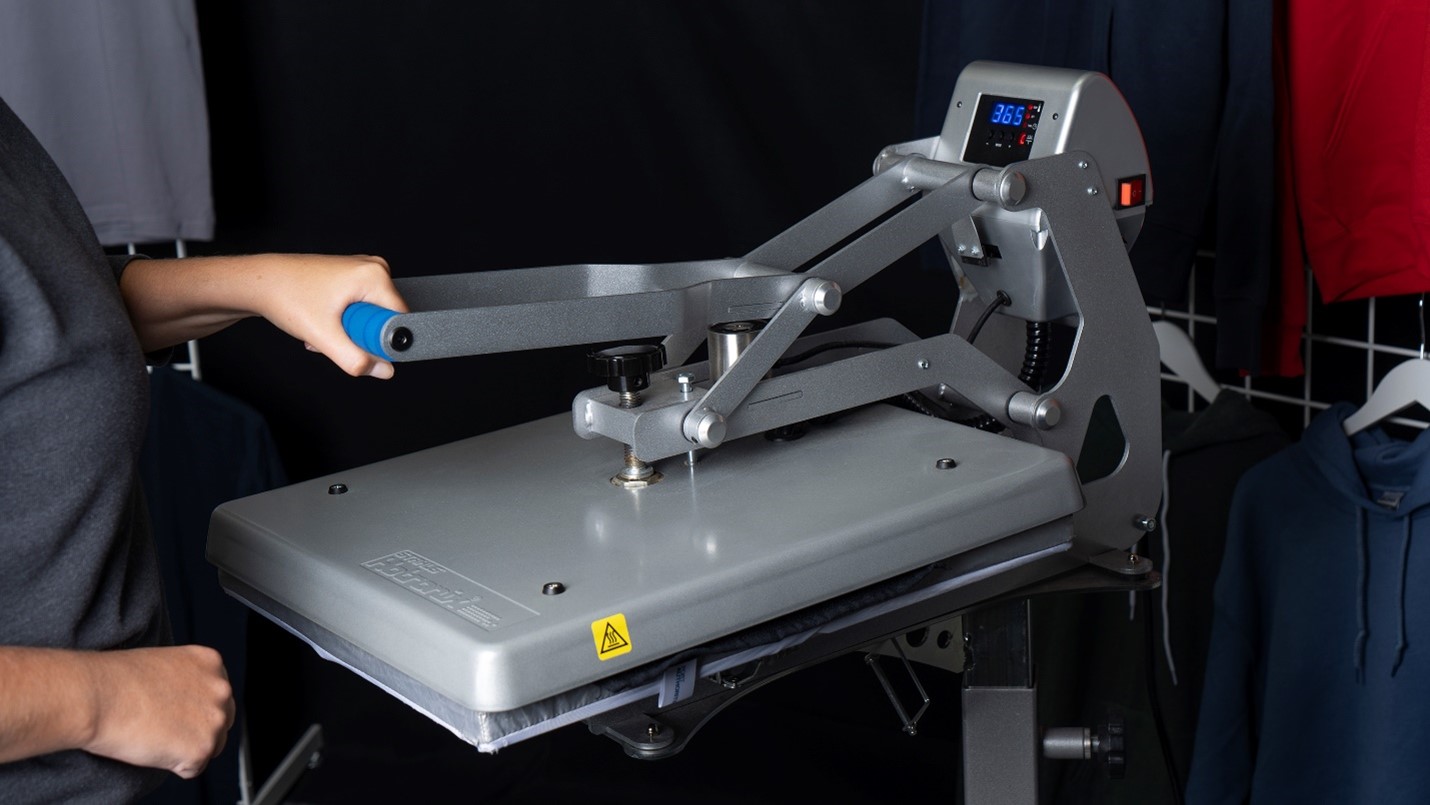
Step One: Set heat press at 365 F.
Step Two: Lay towel flat on the press.
Step Three: Pre-press to remove moisture and wrinkles.
Step three. Credit: STAHLS'
Step Four: Position Goof Proof transfer ink side down on the towel.
Step Five: Press 4-6 seconds and peel hot.
How to Print a Stadium Seat
Custom stadium seats may seem tricky to print, but not if you know this trick. Yes, you can do this with custom printed transfers and your heat press. Here’s how:
This stadium seat is easy to heat press with just one quick trick — remove the stabilizer foam and insert a mouse pad. This gives you a firm, flat surface to press and won’t melt the stabilizer.
Items Needed
- Stadium Seat
- Goof Proof transfer
- Mouse pad to avoid seams and obstructions while pressing
- Heat press
Step One: Remove the stabilizer from inside the stadium seat in the area you will press. It is held into position by Velcro so it’s usually easy to open and remove.

Step Two: Insert mouse pad.
Step Three: Lay the stadium seat on your heat press.
Step Four: Position your transfer ink side down.
Step Five: Press for 4-6 seconds.
Step Six: Peel hot and enjoy your finished stadium seat.
⇒To see someone print a stadium seat in action, check out our video.
Heat printing rally towels and stadium seats with a heat press is a smart way to expand your offerings and tap into the growing demand for custom fan gear. Whether you’re creating one-off designs or producing in bulk, heat transfers like HTV, DTF, and screen-printed options make it easy to deliver high-quality results on a wide range of materials. The flexibility of heat printing also aligns perfectly with print-on-demand services, allowing you to create only what’s needed, when it’s needed — minimizing waste and maximizing efficiency. This versatility makes heat printing a reliable choice not only for sports-related items but for all types of garment and accessory decoration.
Sue Wilcosky is the director of marketing fulfillment at STAHLS’. She has been with Transfer Express and STAHLS’ for 38 years, serving in both customer service and marketing roles as the company grew. She has a degree in Sport Management with minors in marketing and journalism from Bowling Green State University.
Tutorial No. 3 – Creative Sublimation HTV Ideas for Decorating Apparel and Accessories
By Meg Ortiz, POLI-TAPE USA
Ready to get creative and push your boundaries using your sublimation printer and HTV for sublimation? From custom apparel to custom home decor, there are many possibilities beyond ordinary sub blanks that can bring personalization using sublimation to a whole new level. The sublimation printing process creates complex, full-color designs with high-resolution results and a durable finish. Using heat transfer materials developed specifically to be sublimated and applied to textiles allows for creation of amazing personalized designs and finished goods.
Suitable HTV for Sublimation Materials
Standard HTV materials that can be sublimated fall into two categories: polyester (woven and non-woven) and flock (polyester base). These materials are the standard offering and are the workhorses in this segment of apparel decoration. There are also a few polyurethane-base HTV films with special polymer coating that can be sublimated. The last truly sublimation receptive HTV blanks that can be sublimated are glitter HTV products.
HTV polyester materials, which can be sublimated, are often woven polyester twills with either a matte or satin finish. These HTVs can be printed either directly onto the transfer or indirectly using sublimation paper. Non-woven options are also available, are created much like paper or felt, and are made by pressing polyester fibers together to create the transfer blank, like a patch.
Flock-based sublimation HTV blanks are soft, velvety flock fibers that are excellent for sublimation designs and add a slight dimensionality to the finished transfer as the flock fibers are often 300 microns thick. The flock fibers are easy to sublimate and are also either printed direct or indirectly using sublimation transfer paper.
Twill and flock sublimation HTV materials are excellent sources of customized design or home decor as the materials provide texture and dimension to the finished product. Flock HTV can be used on lampshades, bedding, accent pillows, kitchen towels, and more. The finished sublimated HTV designs are vivid and will not easily fade. Before decorating pot holders or oven mitts, testing is suggested to ensure the heat of the oven or pots and pans does not activate the sublimation ink in the transfers.
A fun option for sublimation blanks is lighter-colored glitter HTV products. The majority of HTV glitter material is made using polyester particles to create the glitter effect. Since polyester is what is required to effect sublimation, using HTV glitter is easy and produces a unique, glittery finished product that can be transferred onto a variety of apparel and accessories.
Polyurethane-based (PU) HTV products that can be sublimated are finicky and require patience and ability to stick to the processing and most importantly, washing instructions to guarantee a more durable product. The advantage of using PU film is the material is lighter, softer, and easier to cut and weed, a necessity when creating a larger area design to add negative space and to lighten the weight of the transfer when applied.

Twill and Flock Sublimation HTV Transfers
These are great blanks to sublimate, cut, and transfer onto a variety of apparel and accessories. The quality of the designs is close to photo resolution, especially if the print files are high quality. These transfers can be applied to cotton, cotton/polyester blends, 100% polyester, rayon, tri-blend, and similar materials. These transfers will not work well on sublimated polyester unless they have a blockout property to prevent dye migration. A quick tip is to layer the sublimated design over a light or dark HTV with sublimation blockout properties.
Twill and flock sublimation HTV blanks are perfect for full-color designs such as logos, patterned names and numbers, and personalization. They are perfect for creating iron-on patches of anything you can design. The finished sublimated transfer has high wash resistance. The design will retain its precise resolution and vibrant colors through dozens of washes and will likely outlive the garment.
Twill HTV blanks have either a matte or a satin finish. Matte is the standard finish as is the perfect blank slate for logo designs, patches, name tags, and brand cues on apparel. The satin finish displayed by some transfers adds depth to the design and can be a notch above the standard name plate or logo.
The flexibility of the transfers makes them perfect to decorate hats, shoes, socks, bags, notebooks, journals, jackets, anything that will hold an HTV transfer. The pallet is highly customizable, and because sublimation printing creates vibrant full-color designs, customization of the finished transfers is infinite.
Tutorial: Sublimated Glitter
Glitter HTV products that are made using polyester particles can be sublimated. With the right design, the end results are spectacular. Light-colored glitter is preferred, but using a darker glitter such as gold printed with a black and red ink design is interesting. As with anything else, using quality products makes a difference. Choose a clean, white glitter to begin experimenting with sublimation to glitter HTV. This will tell you the most about your inks, your profiles, and let you know what you might need to change to sublimate onto textured surface.
Do not print directly onto the glitter. No matter how high the quality, glitter particles will shed off the HTV film. The glitter particles clog up and can damage the print heads. Sublimating glitter means using sublimation transfer paper.

HTV glitter comes with the face film adhered to the liner 90% of the time. There are glitter options that are self-wound or with the face film facing up and exposed, on a liner to support it for cutting in a plotter, many with a hotmelt already on the side to be adhered or affixed to the substrate. The point here is that the glitter side of the HTV material needs to be exposed to receive sublimation paper.
Here is a quick step-by-step:
Step One: Use the design file to create the cut file; remember to mirror both.
The printed image can be transferred to the glitter blank PRIOR to transferring the glitter blank to the final substrate. This is tricky but can be followed if the glitter HTV is of high quality:
Step One: Follow the directions for the sublimation printer and sublimation paper, or use the standard 400 F, 60-second dwell time.
Step Two: Place the glitter blank onto parchment or craft paper. Either start here on the platen of the heat press or be prepared to carefully move the sandwiched transfer and printed image to the heat press.
Step Three: Align and place printed image onto the glitter blank — tape the image to the glitter blank and tape the image down to hold in place.
Step Four: Most sublimation transfer papers recommend low pressure on the heat press for the transfer. Regardless, use low pressure in this case so as not to activate the hotmelt on the HTV, which is heat and pressure activated. After pressing the printed image onto the glitter blank, let the transfer and paper cool completely before removing the paper.
Best practice is to test the hotmelt activation and behavior of the glitter HTV in the heat press to determine if the hotmelt activates to a gooey mess if using the second application technique. The first technique, while it requires better placement and alignment techniques, is less complicated and presents better results than the second technique of sublimating the transfer prior to transferring it to the substrate.
Step Two: Print the image in mirror onto the sublimation paper.
Step Three: Cut and weed the glitter HTV design, now called your sublimation “blank.”
Step Four: The easiest technique is to apply the glitter blank to the substrate, following the glitter HTV application parameters. If applying the transfer to the substrate first, apply the transfer and peel the liner as recommended. Let the transfer and the substrate cool completely before the next step.
Step Five: To transfer the printed image to the glitter blank, align the image, printed side down, onto the glitter blank and tape using thermal tape. Cover the transfer and image with parchment or craft paper and press image to the blank at 400 F for 60 seconds, using low pressure on the heat press. Allow the transfer to cool completely before removing the transfer paper to prevent ghosting.
Final Thoughts
This second method of sublimating glitter (or flock, twill, or any textile sublimation blank like a polyester fiber blank) is a win for decorating these materials that do not have hotmelt already affixed. Think of patches, which are affixed to the substrate by being sewn or adhered to apparel using a hotmelt film or powder that is applied at the time of transfer to the substrate. When working with glitter, twill, and flock blanks — which do not have hotmelt already applied to the back of the transfer — you are essentially working with a patch. These patches can be pre-printed using the second method above and stored for a long time.

A note to accompany the patches: If sold or offered separately, they must be covered if transferring using adhesive hotmelt or powder in a heat or hand press to protect the press platen from staining with the sublimation ink that can activate under the heat press during application.
The methods of applying and sublimating blanks can be transferred to twill and flock blanks. All twill and flock sublimation blanks are designated either as direct or indirect print, and detail how to sublimate the products. Finding the perfect products starts with quality blanks that are consistent in color and appearance before and after sublimation.
Meg Ortiz is the Director of Sales and Marketing, North and South America for POLI-TAPE USA. She considers herself an HTV superfan, with more than nine years of experience managing the introduction and development of POLI-FLEX heat transfer vinyl and application tape products across two continents with diverse markets.
Tutorial No. 4 – How to Optimize Plastisol Ink for Better Prints
By Taylor Landesman, Lawson Screen & Digital Products
If you want to be a better printer, you must learn how to modify, adjust, and control your plastisol ink. That ability is essential to achieve the best print quality. It also makes printability easier and allows for more special effects when screen printing garments. There are printers who “just use ink out of the bucket,” but that sets a limit on their quality, as well as drives up costs. Learn to modify and control your own ink and you will be able to achieve great prints with almost any ink.
Plastisol ink is designed to be thick, opaque, and does not dry until cured with heat. These essential characteristics mean it offers flexibility but also requires careful preparation to handle specific print needs. Here are nine of the most effective techniques for modifying, adjusting, and controlling plastisol ink to optimize results.
Technique No. 1 – How to Adjust Ink Viscosity
Plastisol ink is naturally thick, which works well for vibrant and opaque prints and helps the ink “stand up” on the garment. While looking great on its own or working as an underbase, you do not want thick when printing finer details or need a softer feel. Too-thick ink is never fun to print with, whether manually or on an automatic. Therefore, you must adjust the viscosity so the ink flows smoothly, reducing the risk of clogging higher mesh count screens, and achieve optimum print results you want.
To do this, use reducers. Adding a small amount of reducer (about 3 - 5% by weight) thins plastisol ink, making it easier to pass through finer mesh screens and improving detail in the print. Common reducers include:

- Curable reducers, which don’t affect the curing process
- Viscosity reducers, which provide smoother printing for intricate designs.
Be careful not to add too much, as it can reduce opacity.
Make sure that whenever you add a reducer, mix thoroughly to maintain consistent viscosity throughout the ink. Otherwise, the consistency will vary and affect print quality.
Technique No. 2 – Add Extenders for Transparent Effects
Extenders can be added to plastisol inks to create more transparent or muted colors, which is useful for a softer feel, a more distressed look, or to achieve subtle color variations.
Adding a soft-hand extender to the ink reduces opacity and creates a lighter print with a softer feel on the fabric.
A clear balanced reducer can also be used to reduce viscosity, lighten, and extend ink colors while reducing tackiness, making it more suitable for blending and layering effects.
Technique No. 3 – How to Modify for Opacity and Coverage
When you need high-opacity prints, thick, sticky inks often stand-up on the fabric better. The contract of this means that the more you modify to extend and thin an ink, the less opacity it has. Screen printers confront this problem a lot with white ink as everyone is looking for the perfect balance of opacity vs. printability.
If the ink is too transparent, adding high-opacity pigments or using a higher-opacity version of the color can improve coverage on dark garments. This type of modification is most often done at the manufacturing level. If you find your inks are not opaque enough, you might need to look for a different ink brand.
The easiest way to achieve opacity without actual ink modification is to change your print technique. Using a screen with a lower mesh count will deposit more ink onto the garment, improving opacity. Adjusting the mesh count is an effective way to modify ink coverage without changing the ink formula.
Technique No. 4 – Adjust Ink for Soft-Hand and Stretchable Finishes
For fabrics that need a softer feel or require flexibility, such as athletic wear, modifying the ink for better stretchability and a softer feel is essential.
Adding a stretch additive to plastisol ink improves flexibility, making it better suited for athletic fabrics or garments that need to stretch, like spandex, tri-blends, and athleisure wear. This prevents cracking and preserves the design over time.
If the ink feels too plasticky, a soft-hand additive can make the final print feel softer. This is helpful for printing on thinner or more delicate fabrics.

Technique No. 5 – Use Puff Additives for a Raised Effect
Adding puff additives to plastisol ink can create a raised, textured effect that adds dimension to the print. Puff is often used for special designs or unique visual effects.
Adding a puff additive to the ink makes it expand slightly when cured, resulting in a raised, three-dimensional print. This works well for certain design elements like logos, text, or graphic borders.
Using puff inks might require an adjustment to your curing process (time and temperature). Puff ink must be heated exactly right to achieve the desired puff effect without over-expanding or cracking. It’s critical to test the curing temperature and time before running a full print job.
Technique No. 6 – Color Matching and Custom Blending
Color consistency is vital in screen printing, especially for large orders or brand-specific designs. Adjusting ink colors to achieve perfect matches requires skill and a controlled ink room environment. This often means a Pantone book, the correct lighting (not just fluorescent bulbs overhead), and a gram scale. It also helps to have an eye for color.
The best way to achieve exact color matches is to use Pantone guides and pre-mixed colors that use the Pantone guide as a reference. Many screen printers adopt color-mixing systems with precise ratios to match colors accurately.
When mixing colors, work in small batches to start. Blend base colors in measured amounts to create custom shades. Use a gram scale to ensure accuracy, document each mix, and test the color before full-scale production. This is especially important for repeat orders where color consistency is key.

Technique No. 7 – How to Control Curing Temperature and Time
While not technically an ink modification, curing temperature and time is vitally important for controlling your ink. Over- or under-curing plastisol ink leads to problems, which means you need to find the Goldilocks middle. Luckily, a few simple tools and a little testing make this easily achievable.
You need to be able to measure the temperature your garment experiences going through the heat chamber. Note: This is different than what an I.R. heating panel might read as local factors affect the temperature in the heat chamber. Be aware of how the ambient temperature in your shop, belt load (how many shirts are going through the dryer), type of ink, color of shirt, etc., affect the curing temperature.
There are several tools for measuring your heat chamber, with the most common being an infrared gun and Thermo-Tel heat strips. There is no doubt that Thermo-Tels are the most accurate and dependable. A heat gun is good for checking whether the I.R. panel is producing heat (necessary for service issues). Thermo-Tel strips read the temperature the shirt experiences as it goes through the entire length of the chamber, which is more helpful information for ensuring a garment is cured. Plastisol ink requires a curing temperature between 280 F and 330 F for proper bonding to the fabric.
Always test cure a sample to make sure the ink cures correctly without any smudging or under-curing, which can affect wash durability and color brightness.
Technique No. 8 – Use Retarders for Extended Open Time
Plastisol ink does not dry on the screen like water-based inks, which is an advantage in slower-paced or detailed jobs. However, in warm conditions or when flashing on extended runs, adding a retarder can help maintain optimal ink performance when flash curing.
Using a retarder in warm environments can keep the ink from thickening or drying out on the screen. This is particularly helpful for detailed prints that require flashing. Make sure to add a retarder sparingly, as too much can affect the curing process.
Technique No. 9 – Regular Ink Maintenance and Storage
Finally, proper storage and maintenance ensures your plastisol ink remains in optimal condition, allowing you to avoid issues related to thickening or color inconsistency.
Always keep plastisol ink in a cool, dry place to maintain viscosity and color consistency. Extreme temperatures can cause thickening, separation, or uneven curing.
Regularly stir the ink to prevent pigment separation and ensure a consistent mixture. This is especially important for inks with additives or custom blends.
Always stir ink thoroughly before use in production. This breaks the “false body” (ink thickening) that occurs in the bucket and provides for a creamier and easier to print ink.
Mastering these nine plastisol ink modification techniques is essential for creating high-quality, versatile prints. Adjusting viscosity, adding extenders, and using additives enable screen printers to customize ink to meet specific design and print requirements. With precise ink adjustments, screen printers can ensure their work is durable, visually striking, and meet customer expectations for quality and longevity. By maintaining consistent color matching, properly curing each print, and preserving ink quality through careful storage and stirring before use, printers can maximize the effectiveness and longevity of plastisol inks.
Taylor Landesman is the Vice President of Lawson Screen & Digital Products. He is proud to be a third-generation partner at Lawson Screen & Digital Products. Taylor focuses on marketing, sales and helping screen printers achieve more.
Tutorial No. 5 – How to Achieve Top-Notch 3D Puffy Foam Embroidery
By Ed Levy, Hirsch Solutions
One of the primary reasons that embroiders do not try new techniques is fear. Fear causes paralysis of creativity and experimentation. Most processes with embroidery can easily be tackled with nothing more than a little knowledge and a few swatches of material.
When 3D puffy foam was first introduced, it was thought to be nothing more than a fad that would live a brief but successful life and then disappear. However, 3D puffy foam has stood the test of time, and it seems like it is here for the long haul.
3D puffy foam is a piece of foam that is generally 2-4mm thick and is offered in a variety of colors. The foam is sandwiched between the material and the stitching, which elevates the thread, causing it to extrude from the material.
The basic process is as follows:
- Cut out a piece of foam that will cover the area of embroidery that is to be raised.
- Apply some very light tack-down stitches to hold the foam in place. Some people tape the edges of the foam to hold it in place.
- Apply the top stitching.
- Pull away and weed the foam that is not covered by stitches.

There is no special equipment (other than an embroidery machine) required for the 3D puffy foam process. The technique is quite simple, yet many embroiderers are petrified to attempt a 3D puffy foam job.
Those who fail with most embroidery processes often do so because they treat the process exactly the same as they would any other embroidery job. Unique processes require a unique approach, and if the proper approach is taken, then outstanding results can be achieved.
Understanding a few key elements from both the digitizing side and the embroidery side will make all the difference in the world in regards to being successful with the 3D puffy foam process.
Technique No. 1 – Digitizing and Cutting Foam
The digitizing/design creation process is the most important part of the 3D puffy foam process. Traditionally a digitizer is only concerned with creating a proper path or efficiency of the machine movement and also with creating a design that looks beautiful when finished. When creating a design for 3D puffy foam, it is also the digitizer’s responsibility to cut the foam. If the foam is not cut properly, it will not pull away clean when the process is finished.
The top reason for failure with 3D puffy foam is improper cutting of the foam. If the foam is not cut properly on all sides, it will not pull away in a smooth manner.
There are several primary techniques most digitizers use to cut the foam. In many cases, a combination of all the techniques will be used on a single design. In addition to the primary techniques, there are many other techniques used. There is no right or wrong method as long as the technique used works well in both production and the finished product.
1. The first technique is an edge walk underlay. This underlay differs from a traditional underlay as the run stitch length is typically shorter and the underlay is repeated more than once around the perimeter. The only way to cut the foam is for the point of the needle to place a hole in the foam. The more holes in the foam, the more perforated the foam becomes.

2. Next is an end cap. When dealing with a column that does not have any turning stitches, there is nothing that will perforate and hide the foam underneath. A common technique is to cap the ends of columns. A cap is a series of stitches that is applied in the same manner as underlay as it will be covered up by the stitches. A cap is traditionally perpendicular to the top stitching.
3. In conjunction with an end cap, a column that rests on top of 3D puffy foam often ends with the stitches at an angle. Angled stitches will create perforations across the top of a column.


4. Density adjustment. The density required to cover the foam and prevent it from showing underneath the top stitching is significantly more than the density of a standard area of stitching. A density adjustment of 1.5 times to 2 times standard density is often required. This is crucial when pricing a job that has 3D puffy foam. The cost of the foam plus the cost of the additional stitching must be factored into the overall cost of the job.
5. Laser cutting. Laser cutting attachments for embroidery machines help make the job of cutting the foam a much easier process. The laser acts as the knife to cut the foam, resulting in much cleaner edges than having to perforate the foam. With a laser, the foam is cut prior to the top stitching, which is a sure-fire way to ensure that there is not any stubble that protrudes from the foam columns.
Technique No. 2 – Production
From the production side of the process, there are a few simple guidelines.
- Use the same color foam as stitching. For example, if the portion of the design that is to have the 3D effect is to be sewn in white, use white foam. If the same color foam is not possible, then use a color that most closely resembles the color of the thread. Try to avoid a sharp contrast between thread color and foam color as any small pieces of foam that extrude from the stitching may be visible.
- Use a slightly larger needle. A slightly larger needle creates slightly larger holes (or perforations) in the foam, which makes it easier and cleaner to remove. A size 80/12 needle works great in conjunction with 3D puffy foam.
- There may be some small pieces of foam extruding from the stitches after the product is finished. This is a result of either improper cutting of the foam or improper density settings. A heat gun, which applies a very high intensity of heat to a concentrated area, is often used in these cases. The heat shrinks the foam and makes any of the small particles of foam that are outside of the stitching disappear under the surface of the thread.
- Material/Blank. Since the 3D puffy foam is a hard material and the density used is higher, the use of 3D puffy foam is mostly done on a stable material such as headwear. While it is possible to do 3D puffy foam on a garment, the lion’s share of the work is done on headwear.

Many designs incorporating 3D puffy foam consist of letters ranging from a single letter to a full name or sentence. There’s usually a first and last time many embroiderers attempt the process. The key mistake most embroiderers make with lettering for 3D puffy foam is to simply use the stock keyboard lettering that is part of their embroidery software and expecting it to work. The many factors listed above are not taken into consideration with the use of stock lettering, which results in improperly cut foam.
The learning curve is minimal for 3D puffy foam when all of the required adjustments are taken into consideration.
Ed Levy is the vice president of technology at Hirsch Solutions.
Tutorial No. 6 – How to Create an SOP for Image Placement for DTG Printing
By Eric Deem, Millcraft
If you want a successful direct-to-garment (DTG) print, there are a lot of things that need to be considered. Placement is one of them. Not only are there steps to ensure a design is placed properly on the front of a T-shirt, there are also steps to follow for trickier placements like over seams, pockets, and more.
By following this SOP, you will establish a professional, efficient, and consistent workflow for garment printing. This ensures high-quality results, minimizes errors, and streamlines production.
Tip No. 1 – Understand the Blank
The first step in any successful print project is evaluating the blank garment you’ll work with. Each garment type has unique characteristics — such as fabric type, texture, buttons, pockets, zippers, and size — that can significantly impact the printing process. Follow these steps to ensure a smooth workflow:
- Assess the Garment: Identify any challenges posed by the fabric or construction, such as seams, thick collars, or obstructions.
- Determine Print Location: Select the best location for the design. Common print areas include the front, back, left chest, pocket, and sleeves. Be aware that some locations may require specialized techniques or adjustments.
By understanding the garment’s attributes and potential challenges, you can set the foundation for a consistent and repeatable printing process.

Tip No. 2 – Adapting Your Printer for Challenging Garments
Modifying the printer setup is often necessary for non-standard garments. Follow these guidelines:
- Use Appropriate Platens: Most printer manufacturers provide a range of platen sizes and shapes to accommodate various print locations. A smaller platen, such as a 10x12", offers better precision for unique placements.
- Avoid Over-Lowering the Platen: Lowering the platen to account for obstructions like seams or buttons may cause the print area to drop too low, resulting in blurred prints. Instead, ensure the print surface is raised to be the highest point on the garment.
- Utilize Risers: Create risers from materials such as cardboard, coroplast, chipboard, or foamboard. Securely attach the riser to the platen to elevate the print area above any obstructions. This technique is especially useful for printing on deep V-necks or placing designs above pockets on T-shirts or hoodies.
- Rely on Height Detection Sensors: Modern DTG printers often include sensors to detect obstructions. Use this feature to further refine platen adjustments and maintain optimal print quality.
Tip No. 3 – Garment Loading Procedures
Proper garment loading is essential for consistent and professional results. Follow these standard procedures:
- Align the Collar: Place the garment so that the collar is just off the edge of the platen. This ensures the garment lies flat and straight.
- Check Shoulder/Sleeve Seams: Feel under the platen to confirm that the distance from the platen edge to the shoulder or sleeve seams is equal on both sides. This tactile alignment is critical for accurate positioning.
- Use Tactile Techniques Over Visual Cues: Do not rely on visual features like tags or pockets to center the garment. These features are often misaligned, and visual alignment can be deceiving.

Handling Unique Garment Types:
- Tank Tops, Raglans, Hoodies, and Tote Bags: A smaller 10x12" platen minimizes interference from seams or pockets. Follow these specific guidelines:
- Hoodies: Rotate the garment 90 degrees for landscape printing if needed. Use the pocket, collar, and sleeve seams as reference points. A 14x16" platen may be necessary for larger sizes, but a 10x12" platen typically accommodates small to 2XL hoodies.
- Tote Bags: Thread the tote bag onto the platen, which positions it upside down compared to garment loading. Use a dedicated print queue in the RIP software to adjust rotation and alignment for this unique orientation.
Tip No. 4 – RIP Software Settings
Preparing your artwork in the RIP software is the final step before printing. Proper setup ensures precise placement and optimal print quality.
Fine-Tuning Placement with a Paper Mock-Up:
- Print the design onto a sheet of paper.
- Use tape to attach the printed design to the garment at the desired location.
- Have the wearer try on the garment to confirm the placement looks natural.
- Load the garment back onto the platen and take measurements of the print area.
- Input these measurements into the RIP software to ensure the design prints as intended.
Leveraging Advanced RIP Software Features
Modern RIP software offers tools to streamline and automate the process:
- Default Print Locations: Create predefined queues for common print locations (e.g., front, back, left chest) to simplify the workflow.
- Ink Management: Adjust ink settings for different garment types to optimize print quality and prevent wasted time. Software like Digital Factory by CADlink allows operators to run wizards to fine-tune print settings and save unique configurations as default queues for future use.
- Custom Queues: Configure settings for specific garments. Examples:
- Left Chest Prints: Create a queue with a 4x4" print area that automatically resizes larger designs and aligns them 4 inches down and 2 inches off-center.
- Hoodie Landscape Prints: Configure a 10x12" queue to rotate and scale the design for consistent placement in landscape orientation.
Consistency Through Automation
Utilizing automation tools in RIP software ensures repeatable, high-quality results. By standardizing garment loading and print settings, operators can achieve a smooth production process with minimal adjustments.
Adapting to Software Limitations
Not all RIP software offers advanced automation features. Regardless of the software, the core workflow remains the same:
- Accurately load the garment.
- Measure and input the print location.
- Adjust ink settings as necessary.
Eric Deem is the garment and textile print sales manager at Millcraft.