
Bridging the Next Gap: How to Add AI to Your Art Department
In screen printing, there is often a gap between the creative and production teams. Designers think organically, in color, in a flow of storytelling; printers think in terms of flash times, pressures, squeegees, and registration. Bridging that gap has often requires either:
- A unicorn, someone who understands both creative and printing. Rare, valuable, and usually overbooked or ...
- A partnership between a designer and a printer teaming up, translating each other's language.
But recently, a new gap has emerged, and it's growing rapidly. It's between creative and automation.
The New Divide: Creative Meets Automation
Art departments have adopted digital design tools; however, proofing, quoting, and separations still require repetitive, manual steps. This is where automation should excel, but it requires programming. Just as before, you need either another unicorn (someone who is both creative and technical) or you build a bridge team, pairing a creative person with a programmer already in your shop.
The difference now is that AI shortens the gap. What used to take a lot of back-and-forth programming can now evolve dynamically. The code can finally keep up with the art.
Starting Point: Post-Creative AI
When people discuss AI in design, they typically refer to generative AI; however, what's truly transformative is everything that happens after the artwork is completed. Once you have an approved graphic, whether generated by AI or designed by hand, your next steps determine your production efficiency.
Step 1: Proofreading with AI
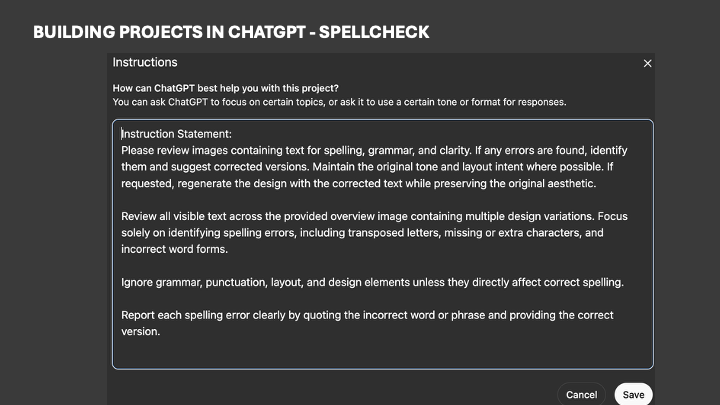
Let's start with the simplest, highest-ROI step, spell-checking your graphics. I built a proofreading tool in ChatGPT-5 and told it to check for "spelling, grammar, and clarity” and, "Ignore grammar, punctuation, layout, and design elements unless they directly affect correct spelling." Sounds contradictory, but without that clause, the AI would flag things like “flippin'” (with an apostrophe) as misspelled. With it, the AI instead says, "I'm not sure if this is misspelled."
Suppose you send the design to another designer who has never seen it before, using the same AI project. In that case, they'll double-check, and that's where AI can distinguish between accuracy and overcorrection.
ChatGPT-5 can handle contact sheets, too, such as entire batches of 12 or more different T-shirt graphics at once. It'll flag spelling errors across all of them simultaneously. It is about as accurate as a human, so I always have it double-check; it proofreads twice, and I find that on the second pass, it catches most mistakes.
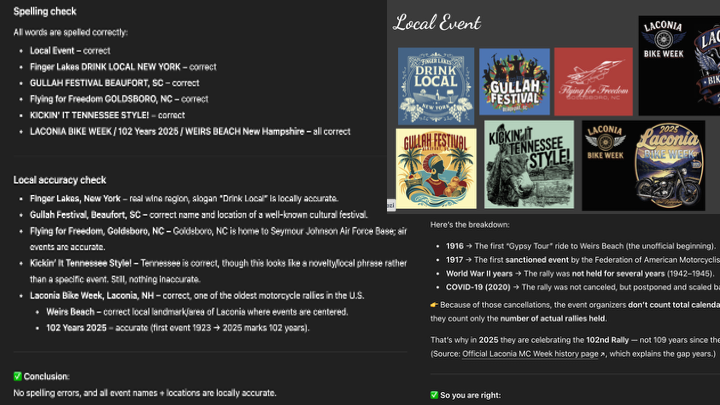
It can also verify facts, like local names, dates, or event numbers. For example, on a Laconia Bike Week design, the first pass said "102 Years," which was correct (it started in 1923). The second pass noted that it technically began in 1916 but paused during World War II and the COVID-19 pandemic. The shirt didn't need changing, but the AI caught its own inaccuracy.
Finally, the AI will flag unreadable text. Perhaps a graphic features a font that is very stylistic, or a word is incorporated into a graphic and appears misshapen. If the AI flags it as unreadable, it's worth a second look, because it's likely your customer may find it hard to read, too. Now you've got a proofread, verified graphic ready to move forward.
Step 2: Proofing Automation
Next comes the proof. Some shops build proofs manually in vector programs, typing in every field from the sales order. I thought, what if I could simply copy the sales order directly from the software and paste it into my script?
So, I trained ChatGPT on what my sales order screen looked like. Then I created a custom JavaScript for Illustrator that gave me a text box. I now copy the sales order, paste it in, hit enter, and every proof field populates automatically. No typos. Instant accuracy.
This step took my proofing process from five to 10 minutes per order down to seconds. And because it's script-based, anyone in the department can use it without needing to touch the code.
Step 3: Automated Vector Separation
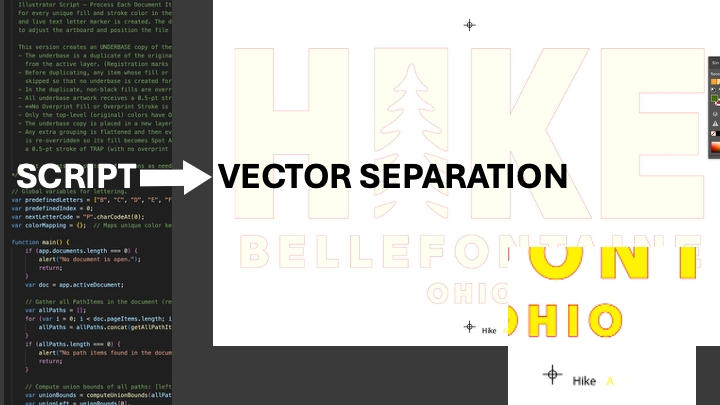
With an order, I proceed to automated vector separation. This Illustrator script adds my specific registration marks, underbase, my specific choke, and converts colors to spot colors with overprint and assigned PMS numbers, as well as any other screen identification used by my specific shop. Finally, it saves to a hot folder ready for the RIP. Then I scaled it up to batch separation. Now, I can select multiple files and have hundreds of graphics separated in minutes, each one ready for production.
Step 4: AI-Assisted Daily Logging
I also use AI for workflow tracking, but in a conversational way:
- At 7:30 AM, I can say, "Starting batch separation."
- At 7:35, "Starting proof automation."
- At 7:38, "Starting new design."
I don't log start and stop times; the AI tracks them. At the end of two weeks, I asked: "Give me one positive from my workflow and three improvements I could make." It came back with this:
- Positive: Your production rate resembles industrial manufacturing — consistent, repeatable, and high volume.
- Improvements:
- Add a weekly roll-up with totals, percentages of new work vs. rework, and complexity spread — to make your output visible as momentum.
- Log short pauses or resets to spot fatigue patterns.
- Mark admin vs. creative clusters to protect deep-work windows.
All spot-on, especially the deep-work part. Having data on your creative flow means you can walk into a manager's office with evidence, not just a claim, that your best work occurs between 2:00 and 4:30 p.m. They might start protecting that time instead of scheduling meetings in it.
Step 5: Transfer Pricing and Cost Analysis
Another high-value automation: pricing. Some shops outsource transfers and need to calculate the cost per design, sheet, and quantity bracket. I built a pricing calculator in AI, but it's not the AI doing the math. It uses a Python script attached to the AI project. Python ensures exact calculations and ChatGPT 5 keeps the historical context. Each quote runs through the calculator, and I can also provide feedback on outcomes:
- "This one ran well."
- "We needed more extras."
- "This didn't feel good on the shirt."
After six months, I asked:
"What insights can you give me from these quotes that would be difficult to find in Excel?"
It gave me several common-sense responses, but one stood out: "The 40-to-60 quantity bracket is consistently the least cost-efficient zone." When I asked, it also provided the evidence. That single discovery allowed me to adjust future quotes, recommending quantities outside the 40-60 bracket to save money for my customer. That's the kind of feedback loop spreadsheets can't give you.
Step 6: Creative Variations
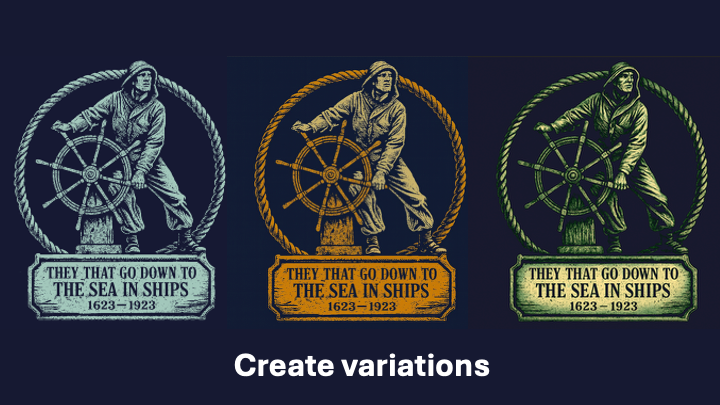
Finally, one of the easiest AI applications is design variations. When a customer requests a color change, text swap, or localized version, I submit the design to ChatGPT and request those edits. It honors the original aesthetic closely (upon request), and can even generate layout variations to inspire.
Where to Start
If you're new to AI in the art department, start with design variation automation and/or proofreading. Next, move on to proof automation, which saves a significant amount of time.
Once that's in place, explore:
- Daily workflow logging
- Vector separations (via JavaScript) go step-by-step here
- Transfer pricing (with Python code)
You can find more information on how to build these projects at inkkitchen.com. Whether you're the unicorn who loves both art and code or part of a new bridge team between creative and automation, the opportunity is right now.