

Tutorial: How to Print Using DTF Transfers
Direct-to-film (DTF) transfers have become a staple addition in many established print shops and a primary printing method for those looking to break into a new market or revenue stream. In the following article, I outline step by step how to print using DTF transfers using our award-winning print by Limitless Transfers as an example.
Step One: Have the Correct File
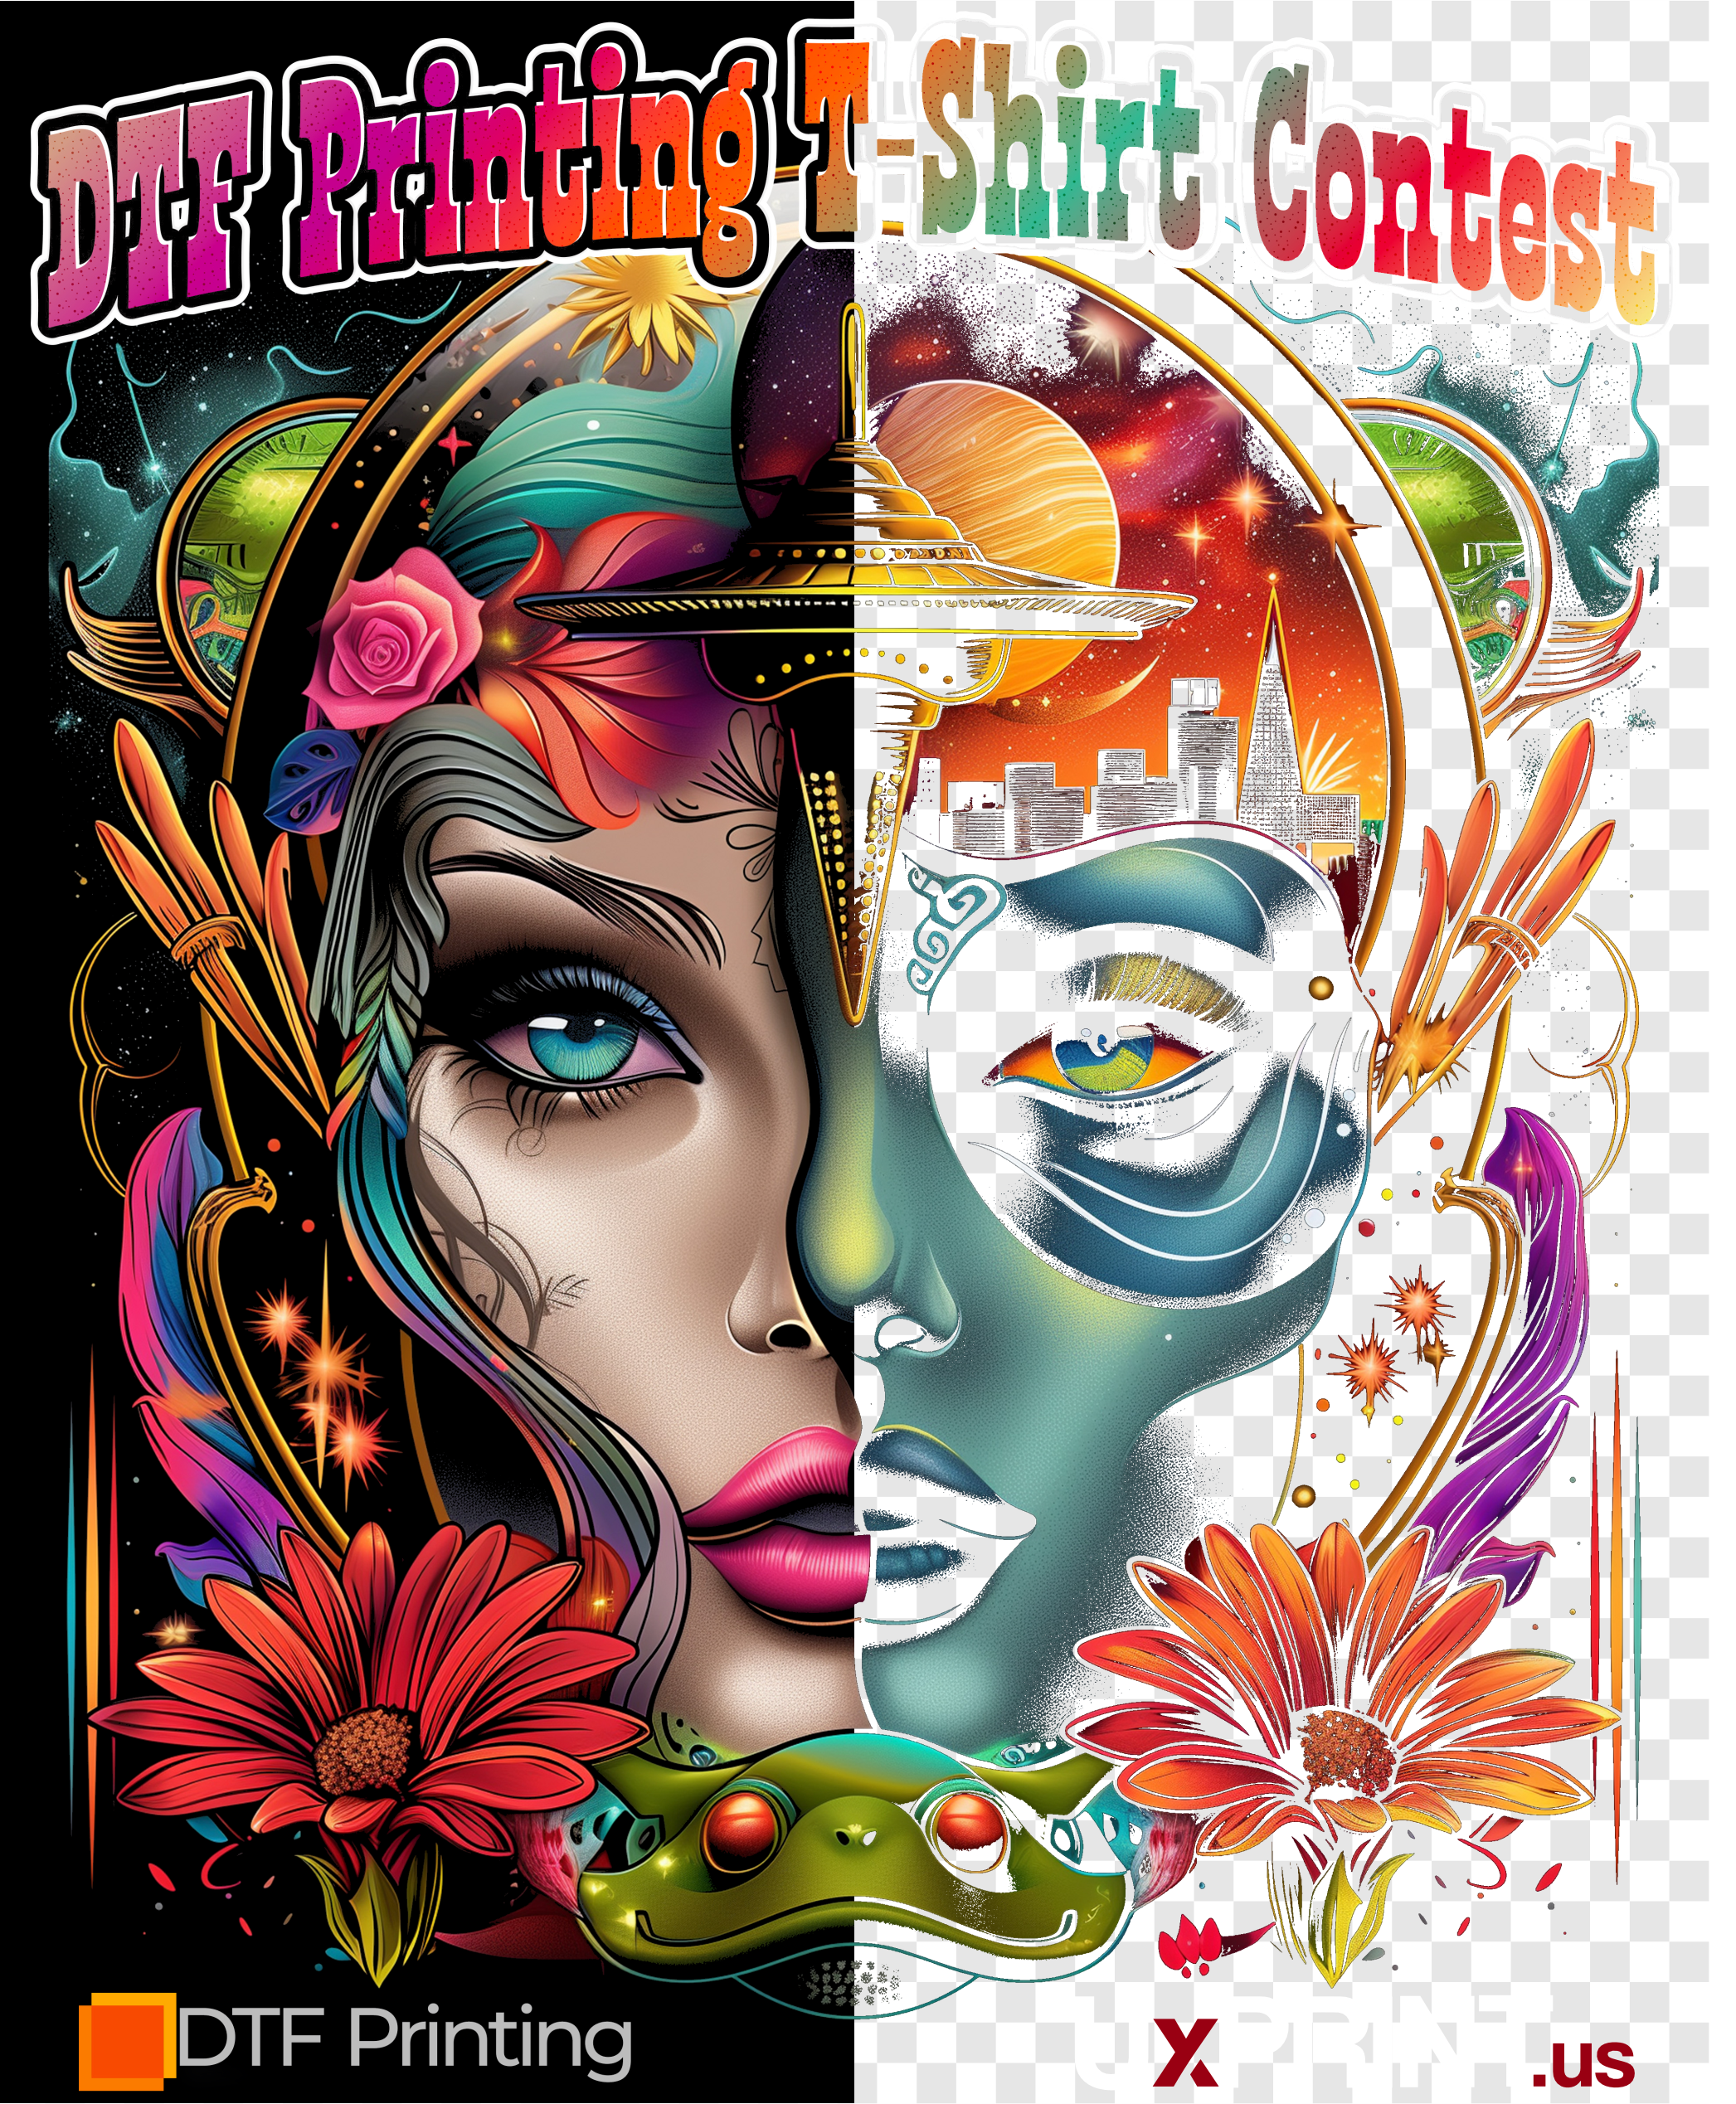
Having your artwork optimized for DTF printing is crucial to getting a beautiful print. | Credit: All images courtesy Spencer Chernoff
Whether you’re printing with your DTF printer in-house or outsourcing your transfers, the most important aspect is your print file. Having your artwork optimized for DTF printing is crucial to getting a beautiful print your customers will love.
For the contest we participated in, all contestants were given the same PNG file to print, and it was up to us to print it to the best of our ability. They purposely supplied a design with built-in challenges, including a black background, gradients, shadows, transparency, and extremely fine details that could easily be lost.
The goal was to remove the black from the artwork (since it was going on a black shirt) without losing the fine detail and to keep transitions from ink to fabric smooth. We rebuilt the logos at the bottom as vector objects, manually removed the black within the white outline in the top text, and used Corel PHOTO-PAINT to remove the black from the rest of the design to a threshold that looked right.
There are also programs that quickly remove black and create a transition from print to fabric using halftones, but with DTF, you don’t want to go above 30 LPI.
The white base needs to be choked, and if your dots are too small, the choke will remove the white base entirely. In testing, we felt the halftones didn’t accomplish what we wanted for this design. Halftoning/rasterizing is a cool effect to have in your toolbox, but we felt it wasn’t a good fit here.
This artwork was intentionally challenging, but since you have control over most artwork, you can avoid many headaches by being proactive. Whether you’re educating customers on limitations or creating designs, you can ensure hassle-free, beautiful prints by starting with the right design. Here are some design elements to avoid:
- Semi-transparent effects like glow and drop shadows
- Extremely fine lines and details
- Neon colors that can’t be produced in CMYK
- Low-resolution images
Once your artwork is ready, you’re set for step two.
Step Two: Printing the Transfers
Now that your artwork is ready, it’s time to print! If you’re printing in-house, use quality film, adhesive powder, and inks. Your environment is crucial to printer performance. Different manufacturers have specific requirements, but generally, it’s about 70° and 50% humidity.
Once a week, we like to check our alignments; if your heads are out of alignment, colors may appear grainy, and the white base may peek around edges. Regular maintenance is key — a well-maintained printer serves you well! For color accuracy, a quality RIP software is essential. There are color spectrometers for accurate color matching, but these can be costly and require experience. Often, it’s best to have a professional calibrate your setup.
If you outsource to a transfer supplier, do your research! The market is flooded with poor-quality transfers. Here are some important factors to consider:
- Turnaround time – How long will it take to receive your transfers?
- Reviews – Check customer reviews for service and quality feedback. Make sure they have plenty of reviews.
- Samples – Order samples to check the quality firsthand.
- Service and Knowledge – Call the transfer supplier! You should be able to speak with someone knowledgeable.
- Pricing – Transparent pricing helps you price your products. Be cautious with extremely low prices — you generally get what you pay for and cheap can be expensive in the long run.
- Website – A user-friendly website is a good sign.
- Hot Peel – Hot peel transfers can speed up production significantly, especially for high volume.
Whether printing in-house or ordering from a reputable company, quality and service are the keys to success!
Step Three: Pressing Your Transfers
Now that you have your transfers, it’s time to cut and press. Your prints will likely be on a roll, so you need to cut them into individual sheets. If you printed them yourself, you’ll already know the pressing settings. If you ordered from another company, follow their instructions for temperature, pressure, and time. Quality transfers applied correctly should hold up as well as screen printing, often outlasting the garment.
Start with placement. Unfortunately, there’s no one-size-fits-all guide for this. We use a mannequin to visualize placement. You can also have a friend or family member wear the garment, tape on the transfer, and measure down from the seam to the top of the print. Write down that measurement for reorders!
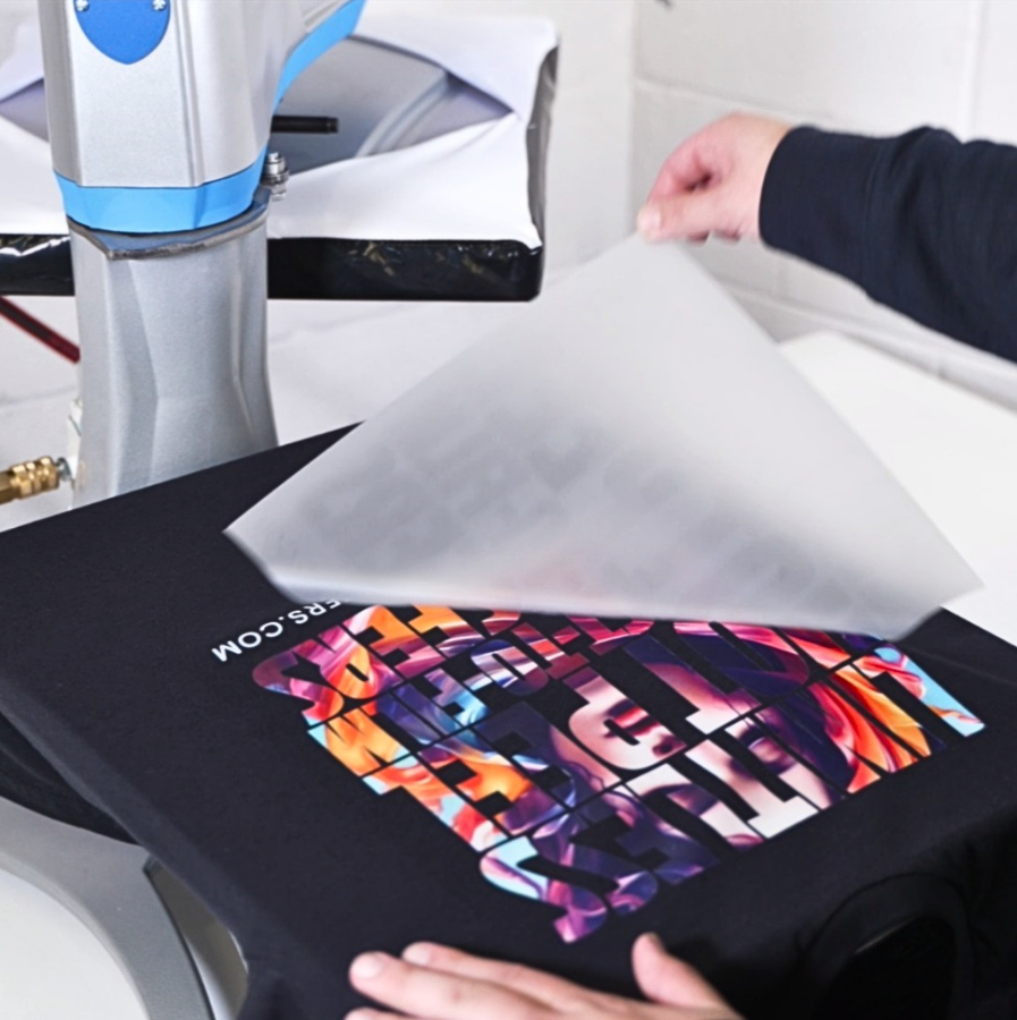
We pressed at 310° for 10 seconds with medium/firm pressure, peeled immediately, then pressed again for five seconds.
If you find that a print looks good two inches down on a medium, then you’ll want to go down an extra quarter inch for every size up. For example, large would be 2 1/4” down, XL 2 1/2” down, 2XL 2 3/4” down, etc. For left chest prints you would do the same thing, then move it over 1/4” in addition to down 1/4” for each size up. As a general rule, the center of the left chest print will be a straight line down from where the shoulder seam meets the collar.
Once placement is figured out, it’s time to press! Every company has different settings, but we recommend 310° for 100% cotton, 280° for 100% polyester, and somewhere in between for blends (290° is safe for most). The contest shirt was a 100% cotton UxPRINT shirt, so we pressed at 310° for 10 seconds with medium/firm pressure (40 PSI), peeled the film immediately, and then pressed again for five seconds to fully set the print. The second press helps the print take on the texture of the fabric, guaranteeing full adhesion, even on fine details. Our transfers call for a cover sheet, but if you have an upper platen cover, it’s not necessary.
With your shirt printed, you’ve completed a successful DTF transfer! When you have the right artwork, transfers, and application, DTF is an invaluable tool. Whether for print-on-demand, a school/company store, small runs, or full-color prints, DTF fills a unique role in the industry, offering an efficient way to produce high-quality apparel.
Note: For the DTF Printing T-shirt contest we participated in, contestants were given the same PNG file to print, and it was up to contestants to print to the best of their abilities.


